 Easter is coming, friends! It is probably my favourite holiday of the year…on a personal level, it is a the reason my faith is so important to me. It’s also when everything seems to be coming back to life…trees are blossoming, the grass is greener (we even cut ours this week!), the sounds of birds chirping are a morning wakeup and the evenings…oh the evenings are so much lighter!
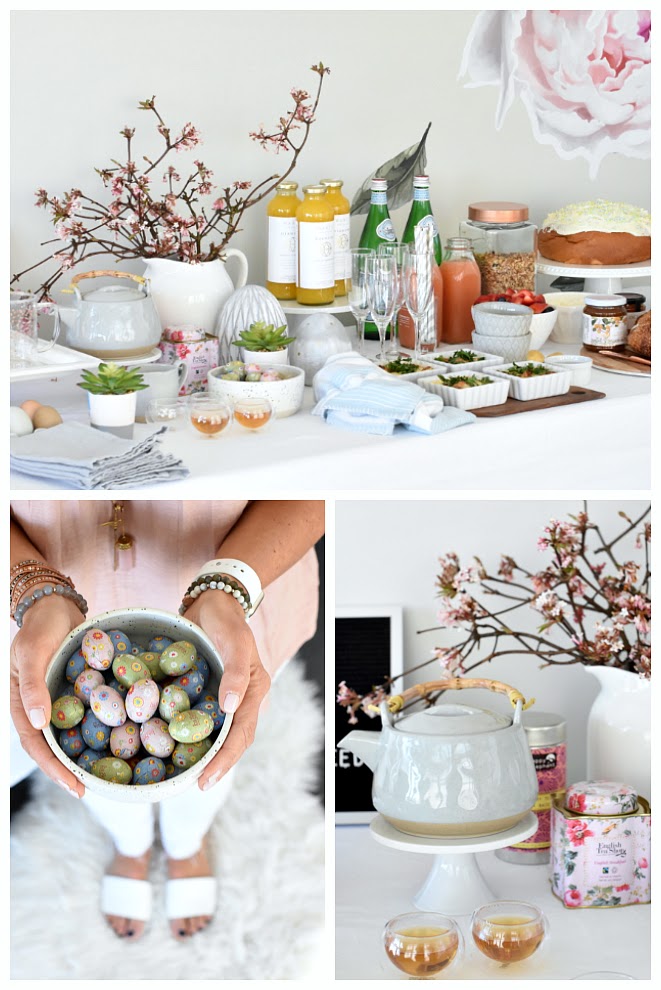
In preparation for Easter celebrations, Pam and I put together a brunch table that we hope will inspire you. Along with the table are some tips to keep Easter entertaining simple and not overwhelming…AND if you read to the bottom you’ll find out a giveaway that we’re hosting with our friends at Winners/Marshalls Canada (yippee!). It’s a loaded post!
Entertaining can be so fun…and so stressful, right? Our idea was to keep it simple (but still pretty) with these couple of steps:
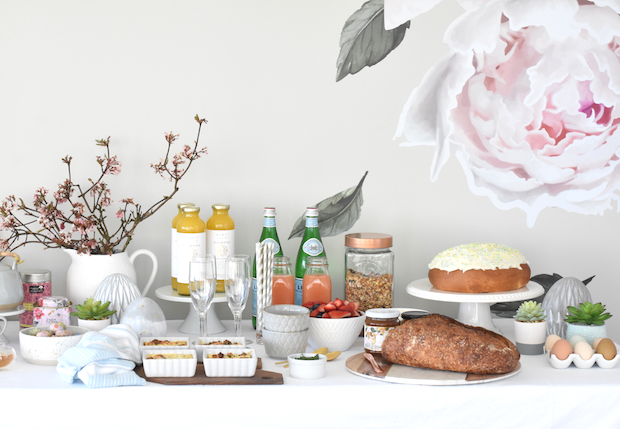
#1. Set your table up the evening before…minus the food. We’ve set it up buffet style this year…as our gatherings keep growing, sometimes it’s easier to allow guests to get their food and find a seat wherever they’re comfortable. Having everything set up with spaces ready for the food cuts down on the running around like a crazy woman the day of.
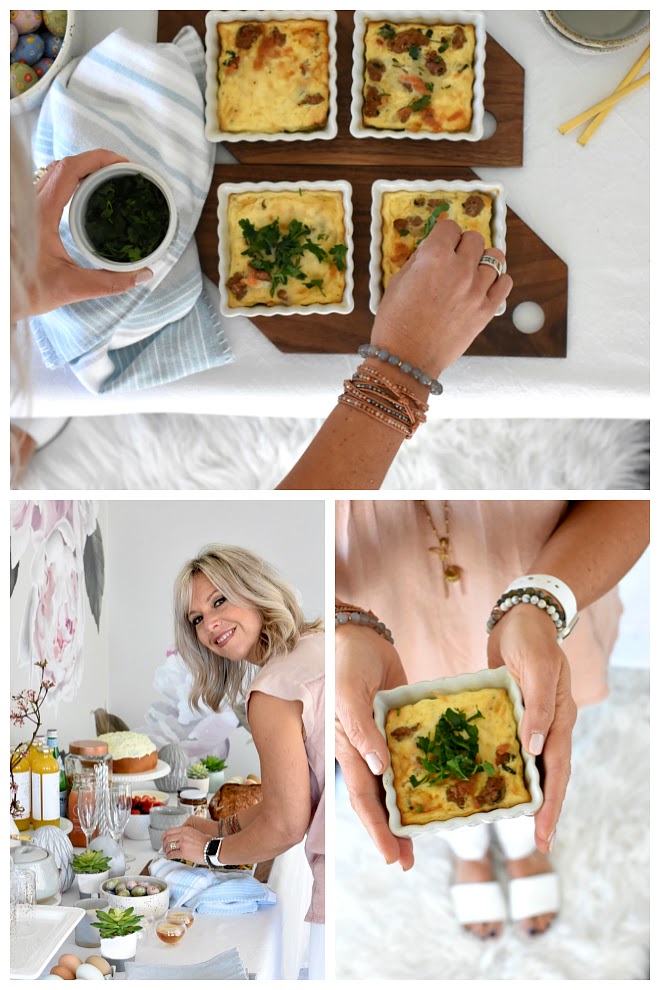
#2. Keep the menu simple. We often feel like we’ve got to offer a multitude of selections…but it’s ok to keep it simple. Our menu included: one hot dish, granola/yogurt/berries, fresh bread with jam selections, paska (Easter bread) and a choice of beverages: americanos, tea and a juice bar. Enough selections for everyone to leave the table full and satisfied. And to allow the cook to enjoy the brunch with everyone too!
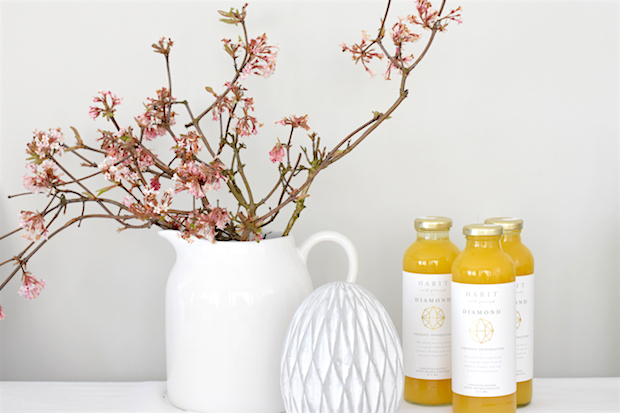
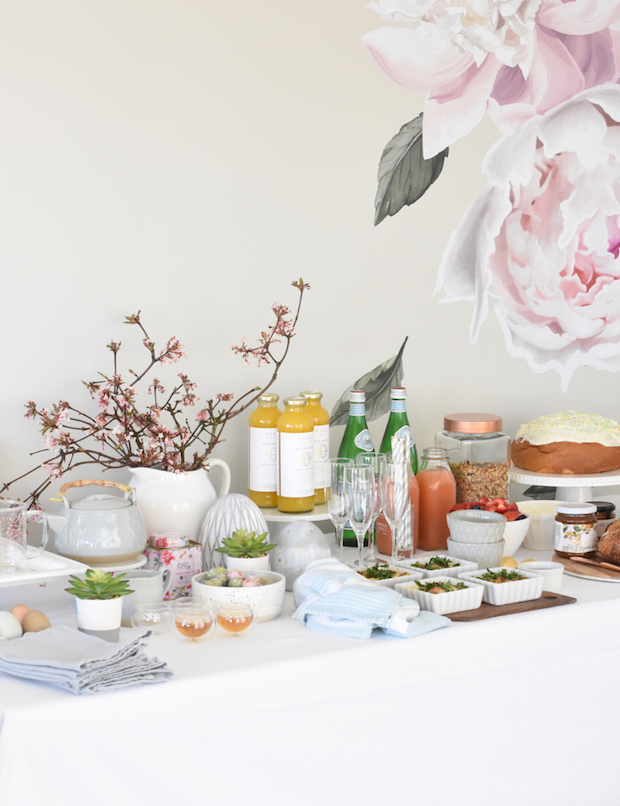
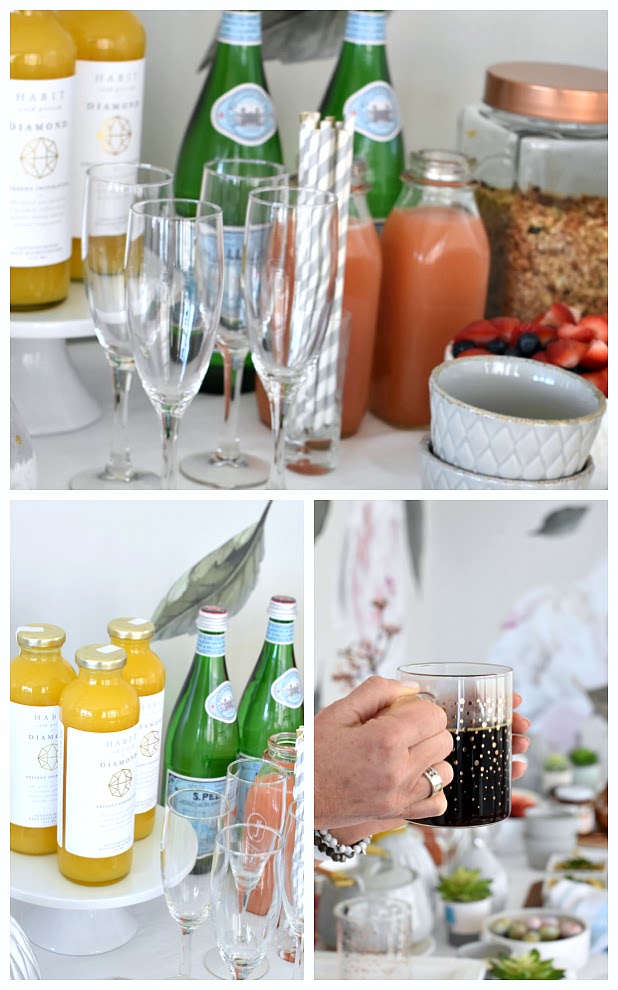
#3. Situate your beverage station on the food table to add elements of colour. We used The Habit Project‘s juices as you only need a small amount, mixed with Pellegrino (or champagne if you’re a mimosa lover) in a pretty champagne glass. The inclusion of some fresh pressed juice completely elevates a juice bar! Don’t forget some cute straws, too.
#4. Choose dishes that can be made in advance. Pam created these turkey sausage egg dishes that can be made the night before and cooked the day of, giving you some breathing room. The recipe for this dish (which by the way was SO good) will be shared this week…Scott is waiting for me to make it again. He loved it.
#5. Use a mixture of collected and foraged items to decorate your table. Colourful eggs from our friend, Jess, were a perfect addition to our Easter table. We also found these individual potted succulents at Marshalls..we can see ourselves decorating with them in future as well. Instead of going the floral route, I took my clippers to my cherry blossom bush in my yard and created a simple statement of some branches in a white vase.
We also found tea in really pretty containers which added to the pastel colour scheme..we love finding items that are of use but contribute to the aesthetic on the table.
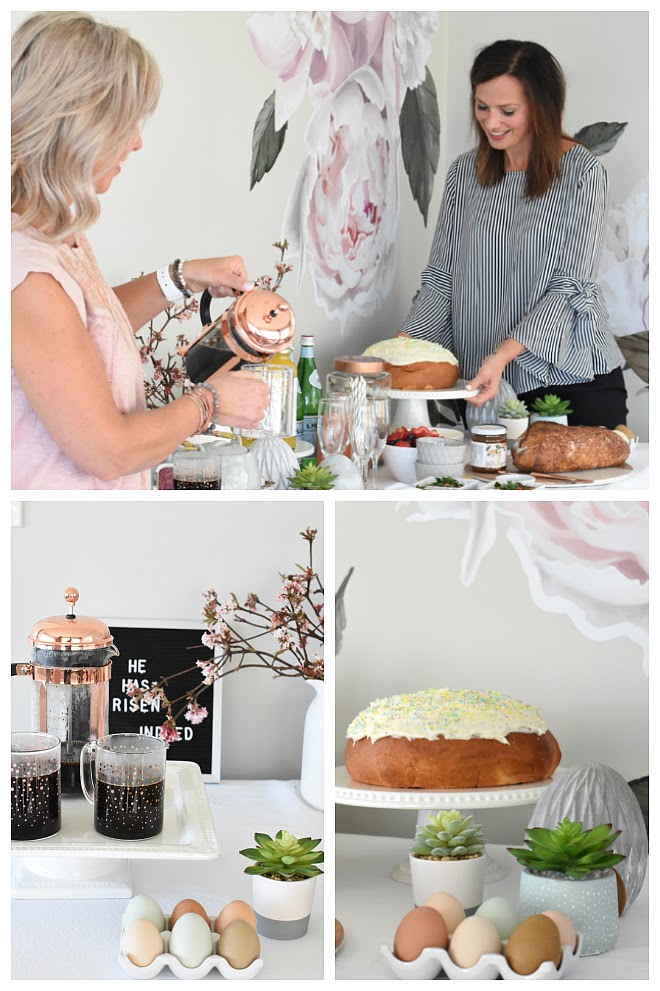
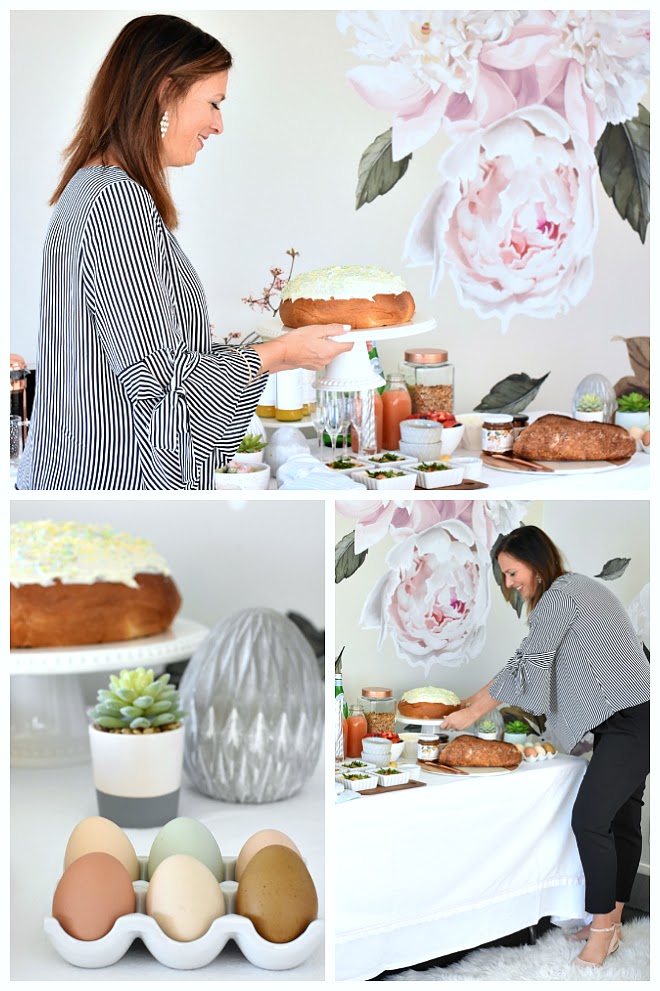
#6. Keep tradition alive. Paska is our families tradition. You’ve probably heard us talk about it before… but it’s something everyone looks forward to indulging in. We’ve posted the recipe with all the pics here ..but I’ve also condensed the recipe and posted it below if you’d like to print out a copy. It’s a generations passed down recipe that was full of Mennonite measurements (aka a dollop or eyeball it!) that we had to have our mom translate for us to actual measurements! If you venture to make a batch, you can make it in advance and freeze it until you’re ready to serve.
Sources:
White Vase, Concrete Eggs, White Cake Stand, Glass Jar with Rose Gold Top, Glass Coffee Mugs with Rose Gold Dots, Teapot, Creamer, Marble/Wood Cutting Board, Rose Gold Spreading Knives ~ Winners/Marshalls
Farm Eggs ~ Jessica Germaine
Organic Chicken Sausage ~ Ross Down Farms
Fresh Bread ~ Fife Bakery
Fresh Pressed Juice ~ The Habit Project
Pam’s Sleeveless Top ~ Marshalls
Laurel’s Top and Shoes, Pam’s Slides ~ Winners
Jams and Tea ~ Marshalls
Walls Decals ~ Urban Walls
And…you’re all so patient!!! The Giveaway…finally!
We are thrilled to partner with our friends at Winners/Marshalls Canada to gift one lucky reader with a $200 CDN gift card.
To enter, head on over to our IG and:
- Follow @sugarplumlaurel @sugarplumpam @winners @marshallscanada
- Tag a friend who’s going to be setting an Easter table this year.
- Enter as many times as you’d like…each comment counts as an entry!
Giveaway closes on Tuesday, March 20th at 9pm PST. Winner will be announced on our IG stories on Wednesday, March 21st. Good luck everyone!
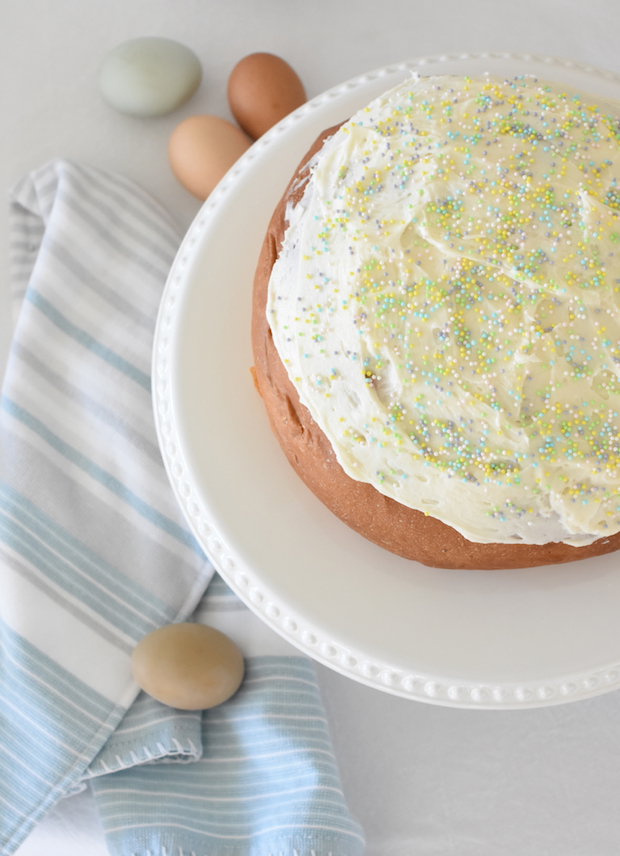
- 1 cup milk, warmed
- ½ cup flour
- 2 Tbsp yeast, rapid or Quick Rise
- 2 tsp sugar
- ½ cup water
- 10 egg yolks
- 2 whole eggs
- 1 tsp salt
- 1 cup sugar
- 2 tsp vanilla
- ¾ cup butter
- rind of 1 orange
- rind of lemon, scant bit
- 5 cups flour
- ½ cup butter, room temperature
- 2 egg whites (egg whites keep the icing fluffy)
- ½ - 1 tsp vanilla
- 2 tbsp cream
- 4-6 cups icing sugar
- Beat warmed milk add ½ cup flour. Make smooth paste and let stand several minutes.
- Mix and let rise: yeast, sugar and water.
- In a KitchenAid or Bosch mixer, beat eggs yolks and whole eggs til light and fluffy.
- Add salt.
- Slowly beat in sugar and vanilla. Beat well.
- Melt and cool butter. Add butter to egg mixture.
- Add orange rind and lemon rind.
- Add yeast mixture and milk mixture.
- Add 5 plus cups of flour and knead. ***BEFORE this step, switch to dough hook attachment.
- As you add the flour, the dough will eventually pull away from the sides of the bowl and become one ball of dough…the texture will be very sticky, this will take several minutes.
- Once the dough is the right consistency (pulled away from the sides of the bowl, yet still very sticky), knead it in your machine for approx 10 min (each mixer varies slightly).
- Empty into a large bowl sprayed with Pam or Canola Oil. Move dough around, spray it with Pam again so it’s covered with oil. Cover bowl with towel and plastic wrap (a dry cleaning bag will generate some heat to aid in the rising.) Let rise for at least 1 hour.
- Punch down and let rise for at least another hour.
- Punch down again and form into loaf “balls” on a pan and let rise for an additional hour on greased cookie sheets.To do this, divide dough into approx 4″ balls..you’ll be surprised how big they will end up being. Make sure to cover once again.
- Bake at 300 degrees until rising well (about 10 minutes) and then at 275 degrees until done (about 20 min more).
- Beat butter in mixer until fluffy. Add remaining ingredients and beat until completely incorporated, smooth and fluffy. Be sure to keep icing in the refrigerator
~Leave the eggs out the night before (GASP!).. you want to use ingredients on the side of being warm for the bread to rise better.
~Do not use brown coated loaf pans…well, that is, unless you love for your beautifully risen bread to sink after baking!
~If possible, make paska on a sunny day…the dough will rise better. Backup plan? Run your dishwasher so the countertop above it warms…then put the bowl with the rising dough on the warm surface! Or turn your oven on for awhile, then turn it off and put the dough in there to rise.
~Don’t ever double the batch
~Use fresh jumbo farm eggs
~Use whole milk.